How to Import an eCommerce Order Into Visual
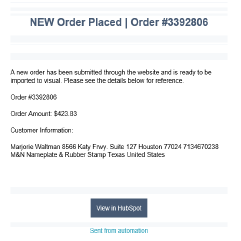
Step 1. Receive Email Notification
-
When a customer places an order on the website, the location that owns the part will receive an email notification.
-
This indicates a new order is ready to be imported into Visual.
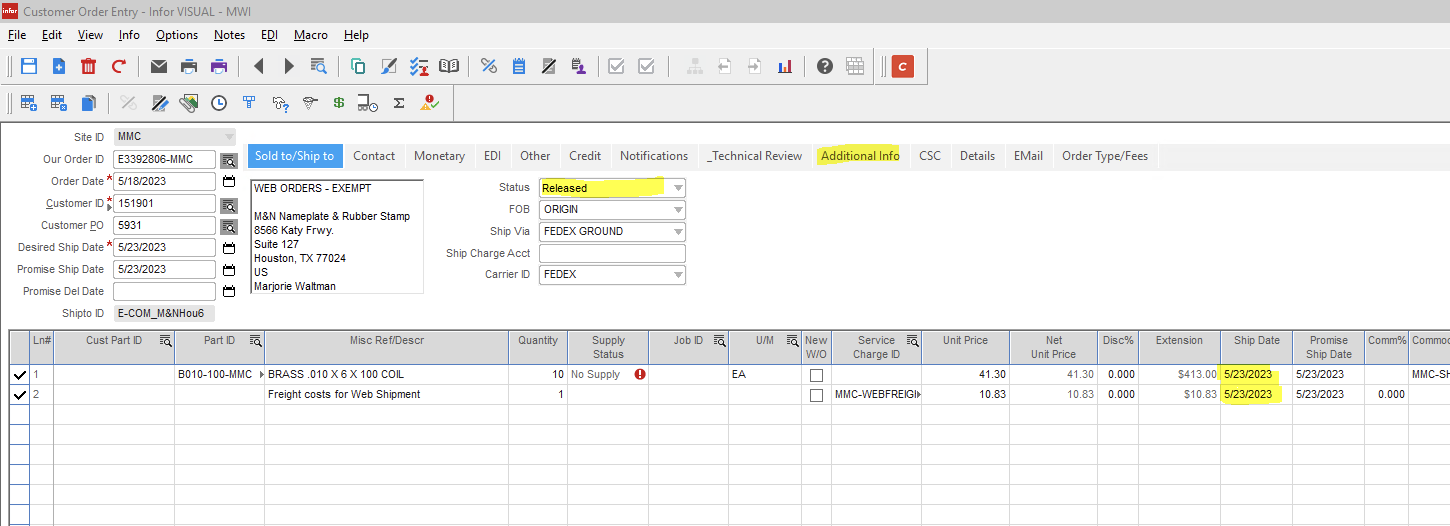
Step 2. Open Visual and Launch Craft
-
Open Visual to the Customer Order Entry screen.
-
Click the Craft icon (our eCommerce website software).

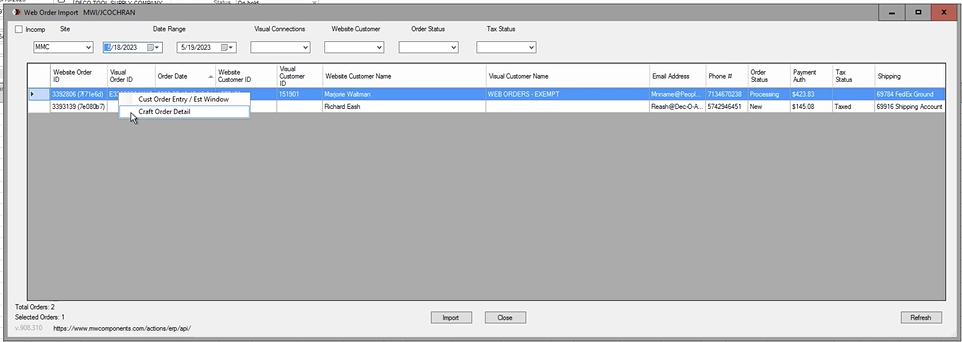
Step 3. Filter Orders By Site
-
Filter results by your location to view only eCommerce orders placed for your site.

Step 4. Determine Order Type
-
E-commerce orders: Begin with E.
-
Converted quote orders: Begin with EQ.
Step 5. Open Order in Craft
-
Right-click on the order line under Visual Order ID.
-
Select Craft Order Detail.
Step 6. Log in to Craft.
- Log in to Craft when prompted. You will be taken directly to the selected order.

Step 7. Verify Payment Status and Customer CIDs
1. Check the far right of the Craft order screen:
-
Paid: Customer checked out with a credit card.
-
Unpaid: Customer used invoicing for bill later.
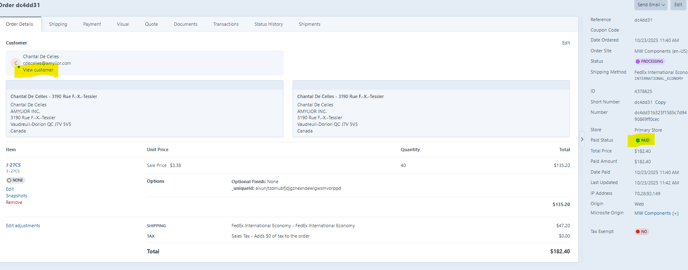
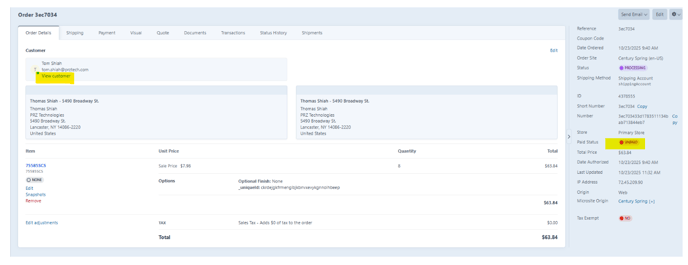
2. Click View Customer to open the customer information.
3. Click Debug User (top right) to view:
-
All CIDs associated with the customer
-
Sites linked to each CID

Purpose: Ensure you have the correct CID for importing the order into Visual. 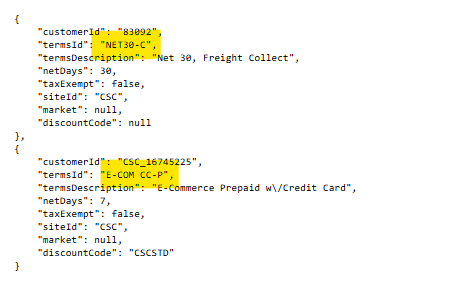
Step 8. Import Order into Visual
1. Return to the Order Import screen in Visual.
2. If the order is unpaid (invoicing), ensure the correct CID is selected.
- Right-click the field to update the Visual Customer ID if necessary.
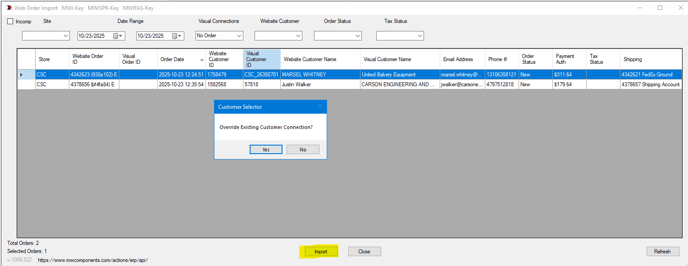
3. Click Import and review pop-ups:
- Confirm Match: Ensure the customer ID is correct. The system should not create a new CID if one exists.
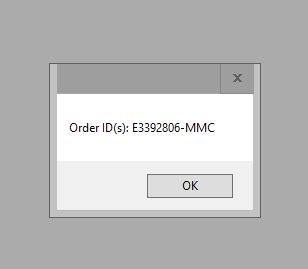
- Create Order: Click Yes to generate the Sales Order ID.
Note: All eCommerce orders import On Hold by default.
Step 9. Verify the Imported Order in Visual
-
Enter the generated Sales Order ID into Customer Order Entry.
-
Confirm the correct CID imported.
-
Paid online → eCommerce prepaid credit card
-
Unpaid/invoicing → terms applied correctly.
-
Check the Accounting tab for correct terms:
-
Step 10: Complete Order Processing in Visual
-
Compare order details between Visual and Craft to ensure accuracy.
-
Update any missing fields (e.g., Order Entered By, PO Received Date, Line Item Ship Dates).
-
For EQ orders:
-
Confirm the purchase order matches the quote.
-
Ensure payment has been accounted for.
-
Verify the order is ready for production before releasing.
-
-
Update order status to Released once processing is complete.